Claude (Web & Desktop)
Claude Web (claude.ai) and Claude Desktop support Custom MCP Connectors with Dynamic Client Registration. Setup takes about two minutes.
Setup
1. Copy the MCP URL from the portal
In the inboxmcp portal under Integrations
you'll find your MCP URL — format: https://mcp.inboxmcp.io/mcp.
2. Open Connectors in Claude
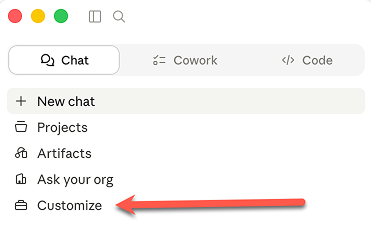
In the left sidebar, click Customize.
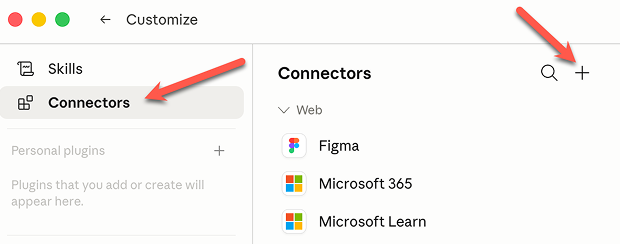
Then pick the Connectors tab and click the + icon.
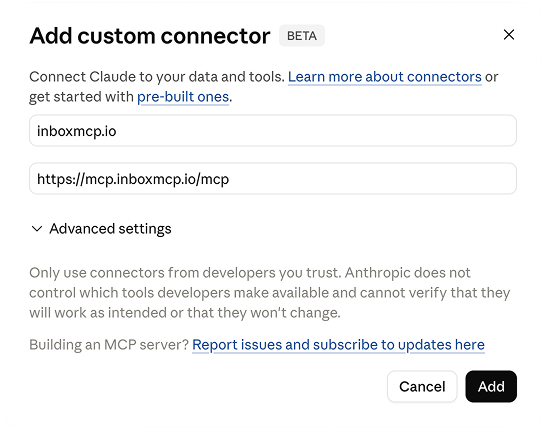
3. Enter the connector details
Name (e.g. "inboxmcp.io") and the MCP URL from above. Leave Client ID / Secret empty — Claude registers itself automatically via OAuth.
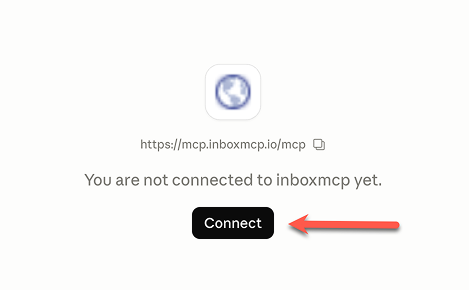
4. Connect
Click Connect. A browser tab opens, you sign in to inboxmcp and confirm access.
What Claude can do now
- List and search mailboxes
- Read individual messages, including attachments
- With Premium / Business: create drafts, move messages, manage folders
The tools available depend on your inboxmcp plan — see MCP tools overview.
Disconnect
In Claude: Customize → Connectors → inboxmcp → Remove.